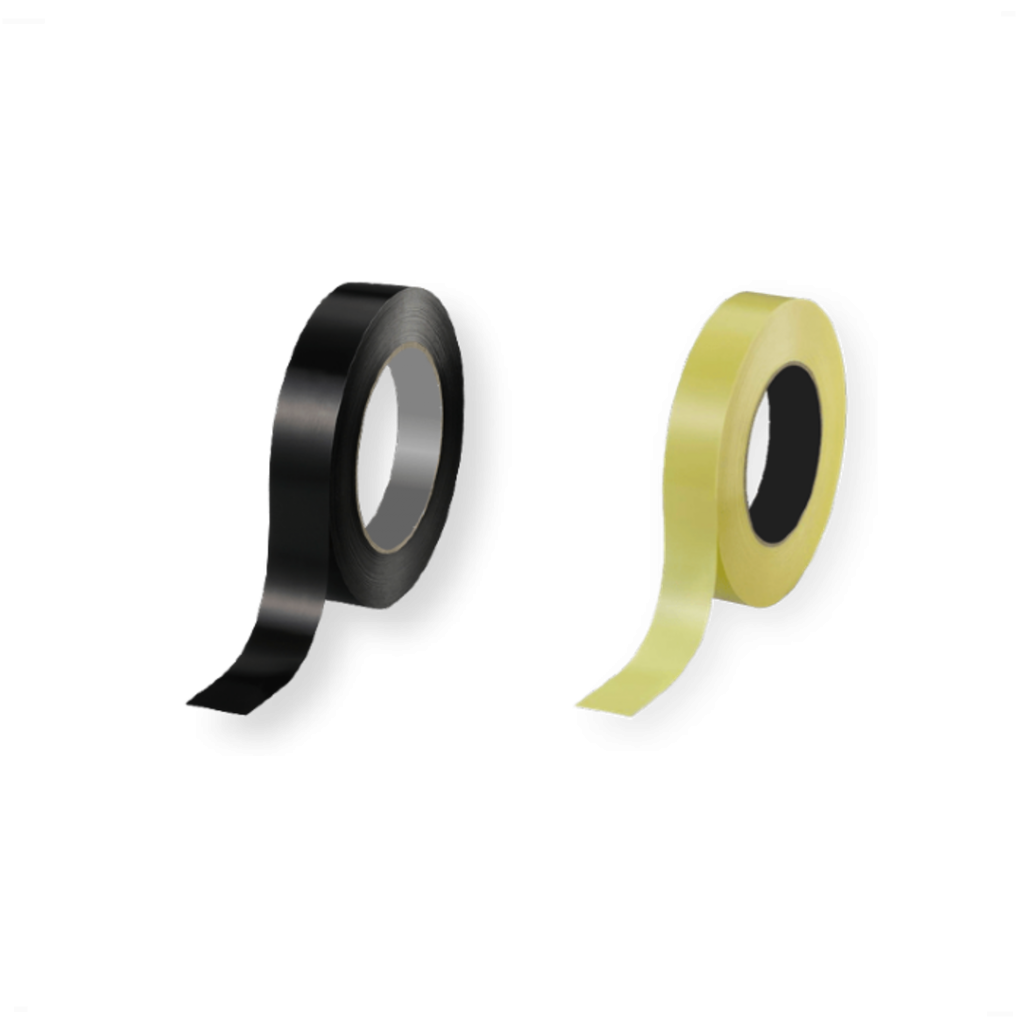
Tubeless valves work just the same as they do on an inner tube. The difference here is that tubeless valves have a small rubber bung on the end, which come in various shapes and sizes to suit different rims – some narrow, some wide, some round, some square.
Getting a good fit is crucial to creating an airtight seal around the rim’s valve hole. The valves also come with a lockring, usually with a rubber o-ring which fits snugly inside which helps avoid damage to the rim.
Your valves must be long enough so that, when installed in the rim and all lockrings and o-rings are fitted, there is still sufficient length to fit your pump easily. As a rough guide:
• Rims up to 20mm depth must use valves of 36mm or longer
• Rims up to 30mm depth must use valves of 44mm or longer
• Rims up to 45mm depth must use valves of 60mm or longer
How To Fit Your Valve
Insert the valve through the valve hole and fit any rubber o-rings and lockrings supplied (some carbon rim manufacturers stipulate not using the o-ring to allow air to escape from the rim cavity if needed – check with your manufacturer or supplier). Ensure the rubber bung on the end of the valve is sitting tight and snug in the rim – it needs to be absolutely airtight. If you can’t get a good fit, or if you can see a gap between it and the rim, you may need to switch your rubber bung for one of a different shape. Round ones, square ones, firm ones, squishy/malleable ones, large ones and small ones are all available. If your valve has a fixed bung and you can’t get a good fit, try switching your valve for one with a different shape or a valve with interchangeable bungs.
Tubelessspares.com ‘pro tip’: Check the valve is tight by pressing the head into the rim with your knuckle, while tightening the lockring with the other hand hand.
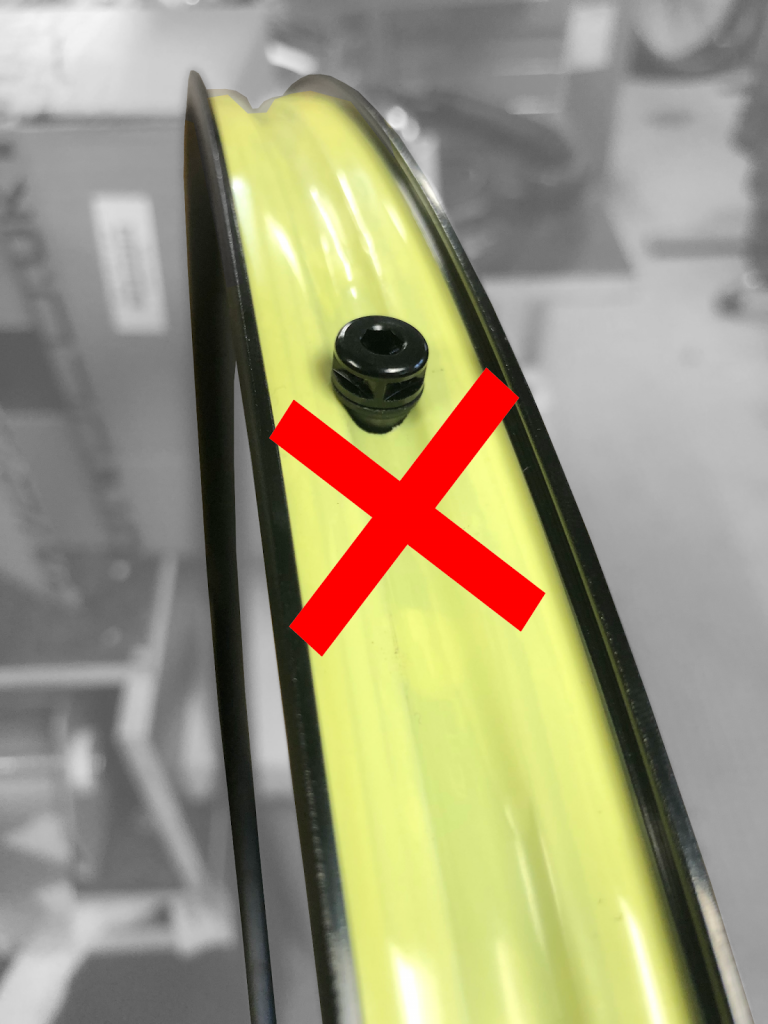
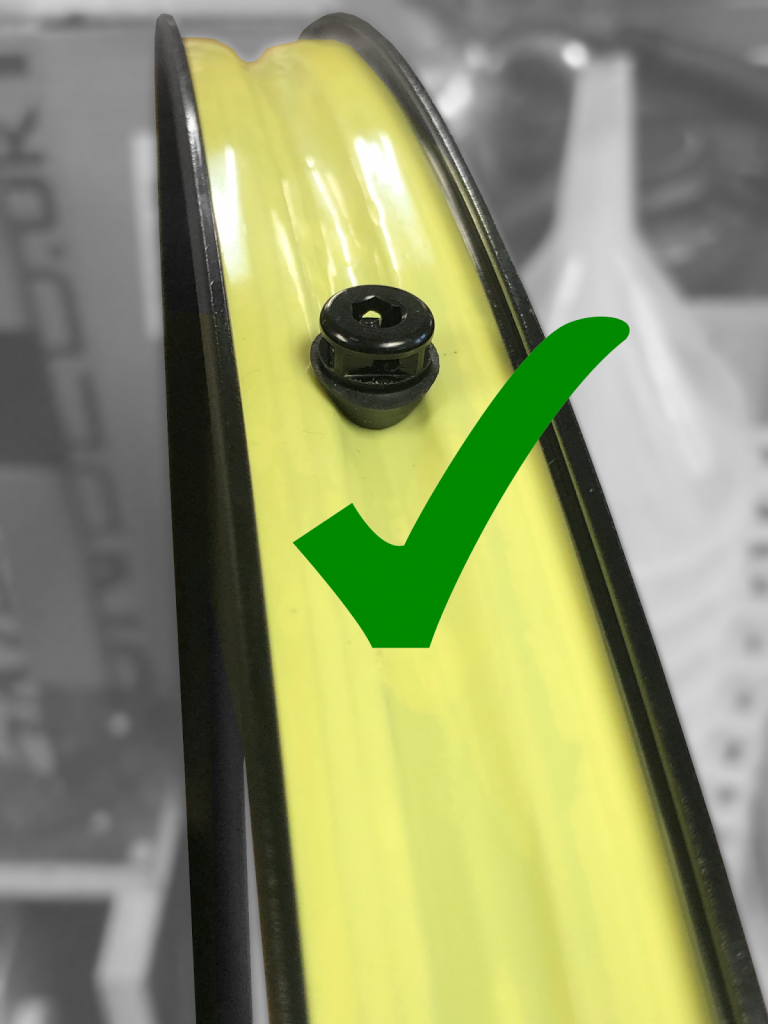
Compare the two images below: one shows a poorly fitted valve which won’t create an airtight seal. The other image shows a well fitted valve, with no gaps to allow air to escape.


If the lockring has flats for a spanner, do not be tempted to overtighten it, as they are there to aid removal later on, not for installation. The lockring should be as tight as you can get it with your bare hands – remember you may need to remove it at the roadside and if you use a tool to tighten it, you risk not being able to remove it in an emergency.


Note: you cannot use a generic lockring (the type supplied with an inner tube) with a tubeless valve, as it is not designed for this purpose. Signs that your lockring isn’t suitable include it not accommodating a rubber o-ring underneath (although some tubeless valves do not require an o-ring) and cannot be tightened enough to ensure an airtight seal.
When you’re ready, see the guide on installing tubeless sealant, or view all the guides by clicking here.
Enjoying the guide? The information on tubelessspares.com is free! But running a website is not…
Your contribution is very much appreciated.
DonateMake a monthly donation
Your contribution is appreciated.
Donate monthlyMake a yearly donation
Your contribution is appreciated.
Donate yearly